Documentation
Installation
1. In your Admin panel, go to Appearance > Themes and click the Add New button.
2. Click Upload Theme and Choose File, then select the theme’s .zip file. Click Install Now.
3. Click Activate to use your new Theme right away.
or
1. Unzip .zip file and FTP it to your hosting server under wp-content/themes/ of your WordPress installation directory.
Theme`s Requirements
1. Theme uses custom resolution for displaying the images. To make sure the Images already uploaded are displayed correctly install and run Regenerate Thumbnails plugin.
2. Contact Form 7 plugin is required to display Contact Form correctly.
3. We recommend to install and activate our Coming Soon free plugin to display custom Welcome page to visitors while seting up your new website.
Theme Basic Setup
Multi-page/ One-page setup
After Theme activation default Page “Portifo – Onepage – Do not delete” is automatically created. It uses slug “niteo-onepage” which is important. Please do not delete or change the slug. You can change Title of this page as you wish.
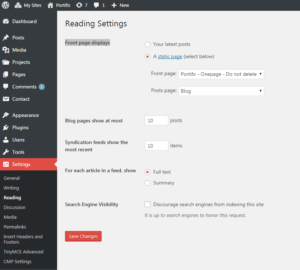
By Default, Theme is set as Multi-page. To enable One-Page setup follow these steps:
- Go to Settings > Reading > select Static Page and choose Portifo – Onepage as Front Page. If you would like to use a Blog in your website, go to Pages > create New Page with any Title (we use Blog in our demo) and select it as a Posts page.
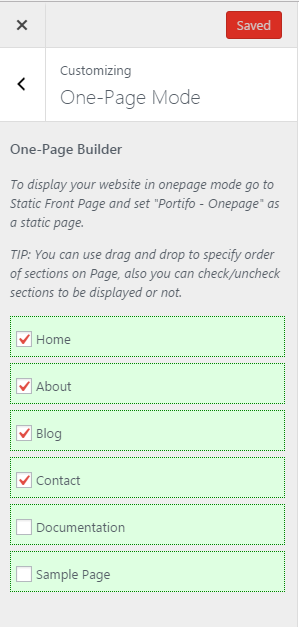
- Go to Customizer > One-Page Mode and select desired Pages to display on One-Page. You can also Drag&Drop the order of the Pages how they will appear on website.
Custom Pages
We prepared 3 Page Templates with special design for your use – Portfolio template, About template and Contact template.
Portfolio Page
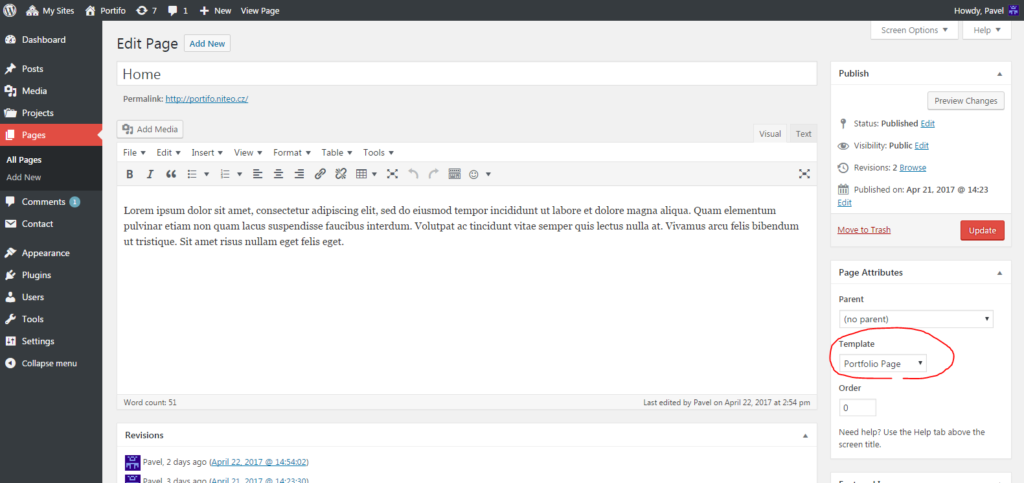
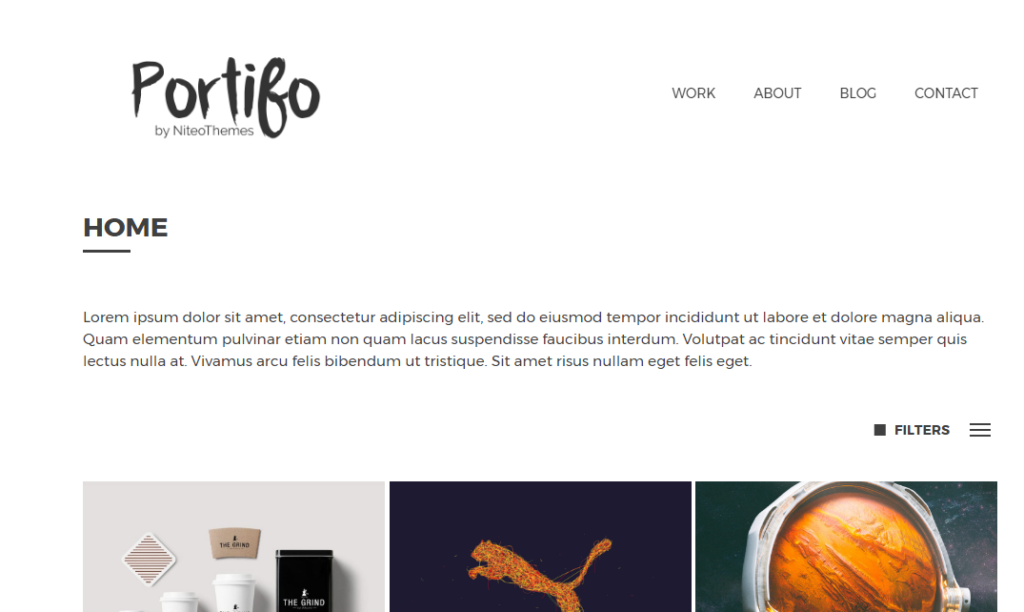
- To create Portfolio Page Go to Pages > click Add New and create new page. Title will be displayed only on One-page (if set). You can insert custom text to Visual Editor – this text will be displayed on top of your Portfolio Page.
- Select Portfolio Template as a Template In Page Attributes.
About Me Page
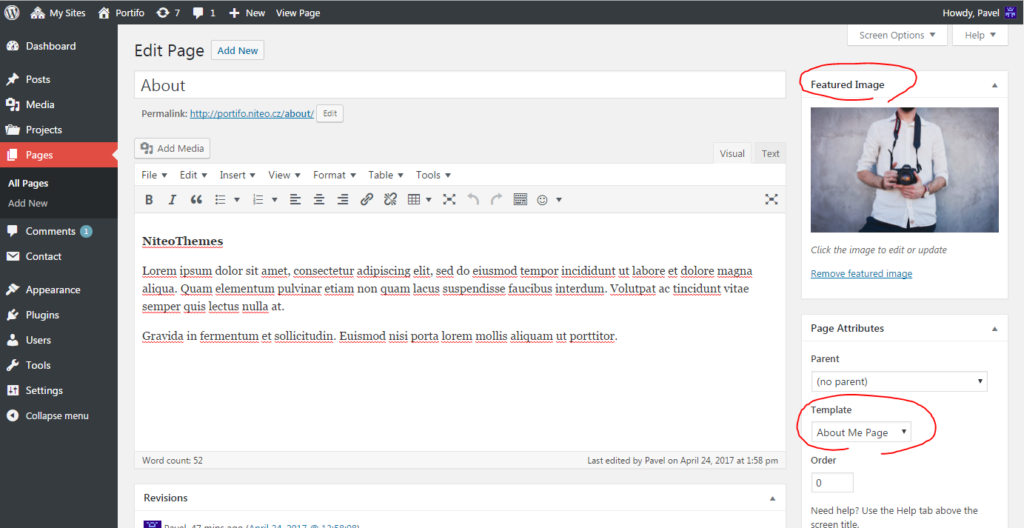
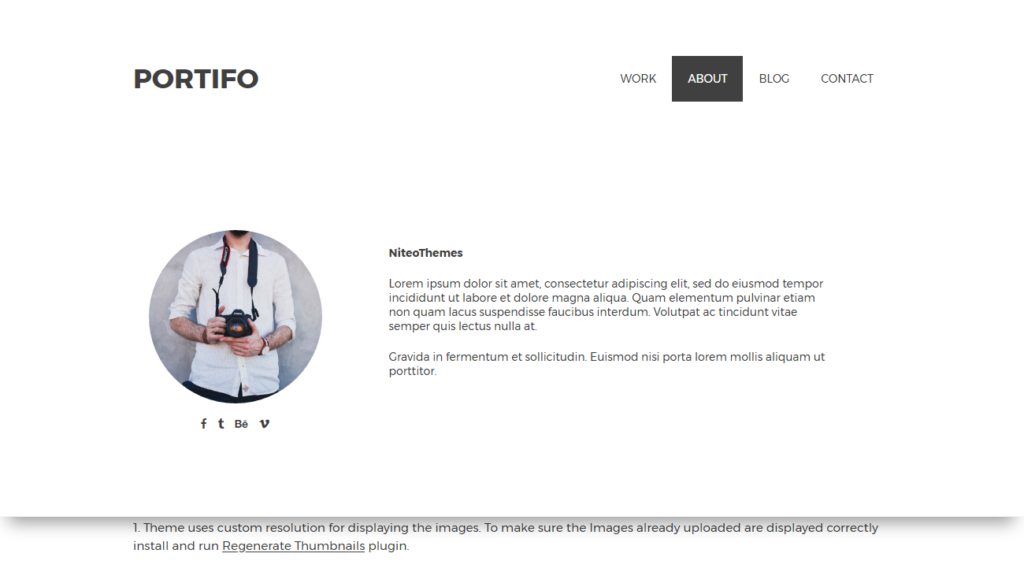
- To create About Page Go to Pages > click Add New and create new page. Title will be displayed only on One-page (if set). You can insert custom text to Visual Editor – this text will be displayed next to your Avatar Photo on About Page.
- Set Featured Image to About Page to display Avatar Photo.
- Select About Me Page Template as a Template In Page Attributes.
Contact Me Page
- To create Contact Page Go to Pages > click Add New and create new page. Title will be displayed only on One-page (if set). You can insert custom text to Visual Editor – this text will be displayed next to your Avatar Photo on About Page.
- Select Contact Me Page Template as a Template In Page Attributes.
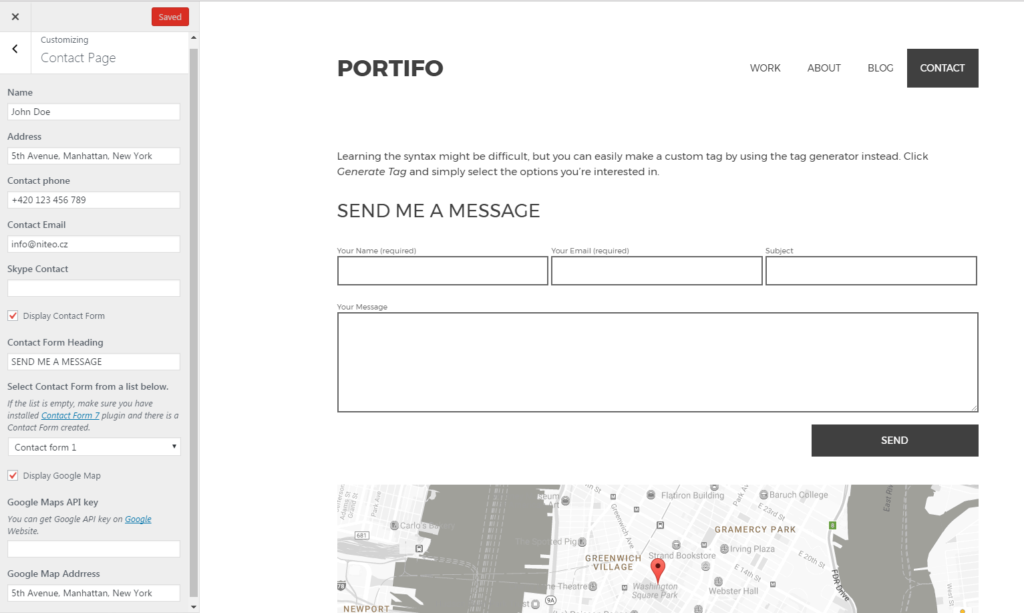
- Go to Customizer > Contact Page to edit your Contact Details. You can also enable/disable Contact Form (You need to have Contact Form 7 Plugin installed to enable this option) and enable/disable Google Maps stripe.
Menus Setup
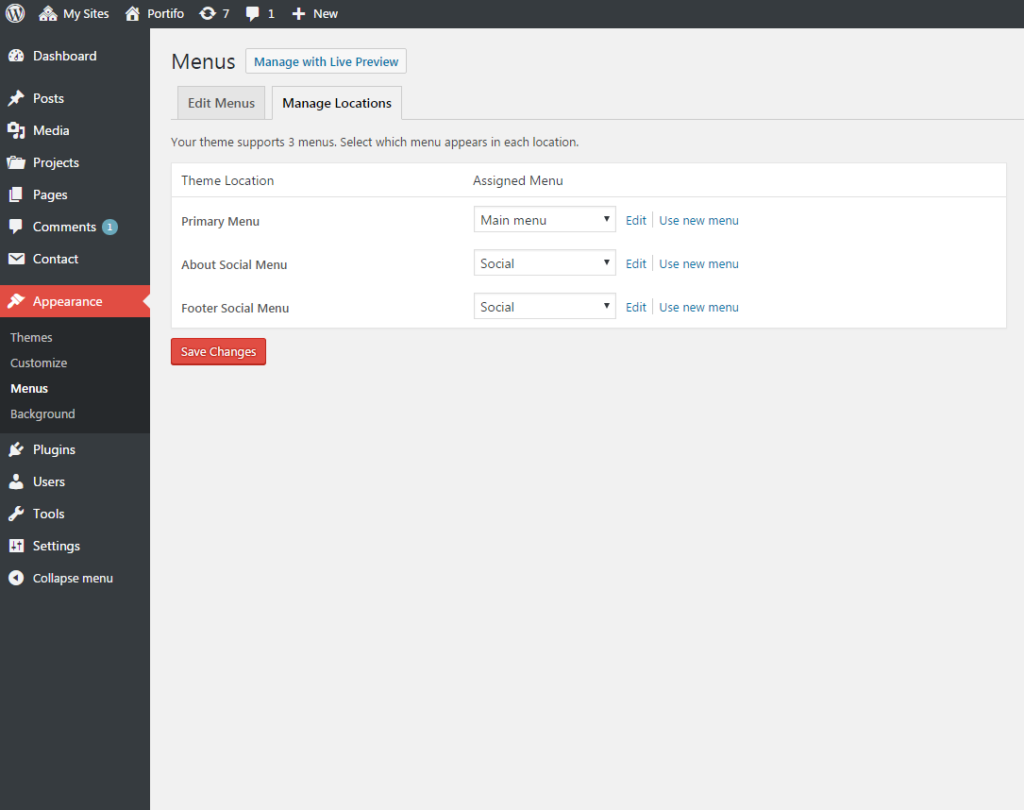
Theme Supports three menu locations: Primary Menu and Footer Social Menu and About Social Menu.
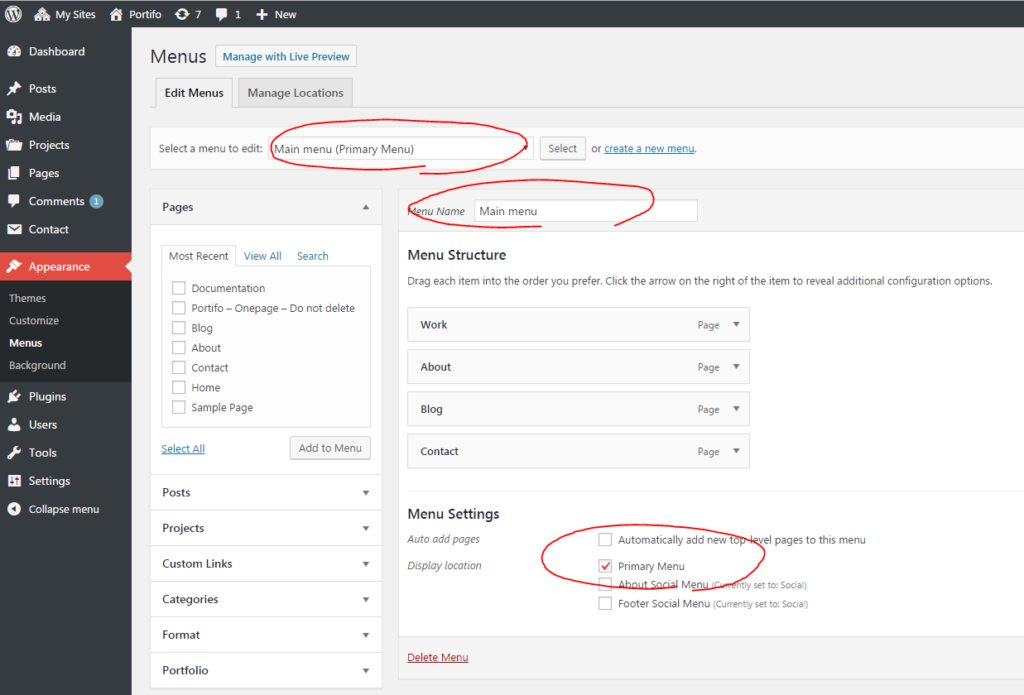
1. Go to Appearance > Menus and Create New Menu. Use Title as you wish (we use “Main Menu” on a screenshot below) and insert links to your Pages. When you are done assign this menu to “Primary Menu” location.
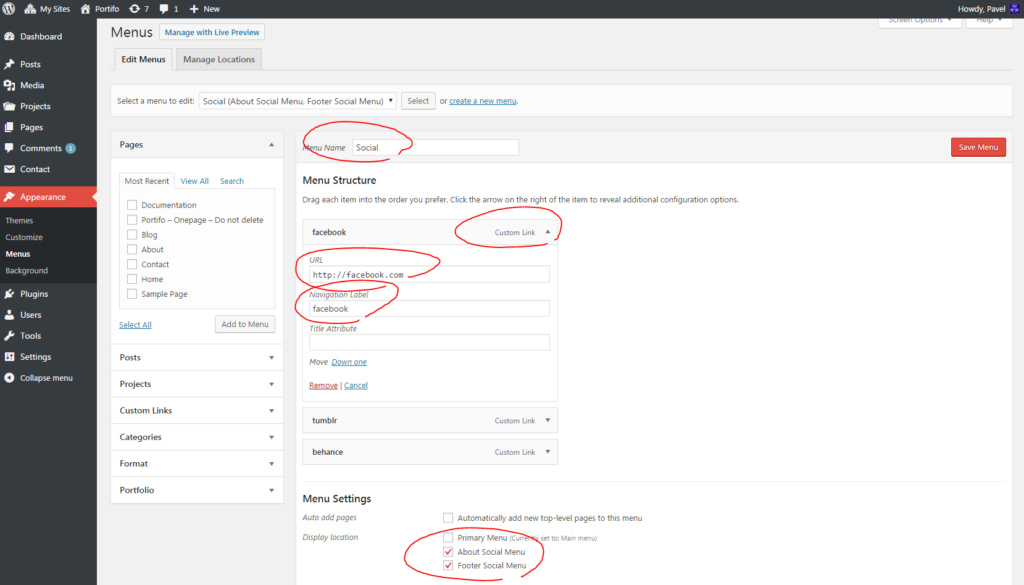
2. Create another menu for Social Icons for website footer and Assign it to “Footer Social Menu” and “About Social Menu” location. For each social media website insert Custom Link where URL is link to your social profile and Navigation Label is name of Font Awesome Icon. (Almost always it is enough to just type in “facebook”, “instagram”, “500px”, etc). See on screenshot below.
Portfolio Setup
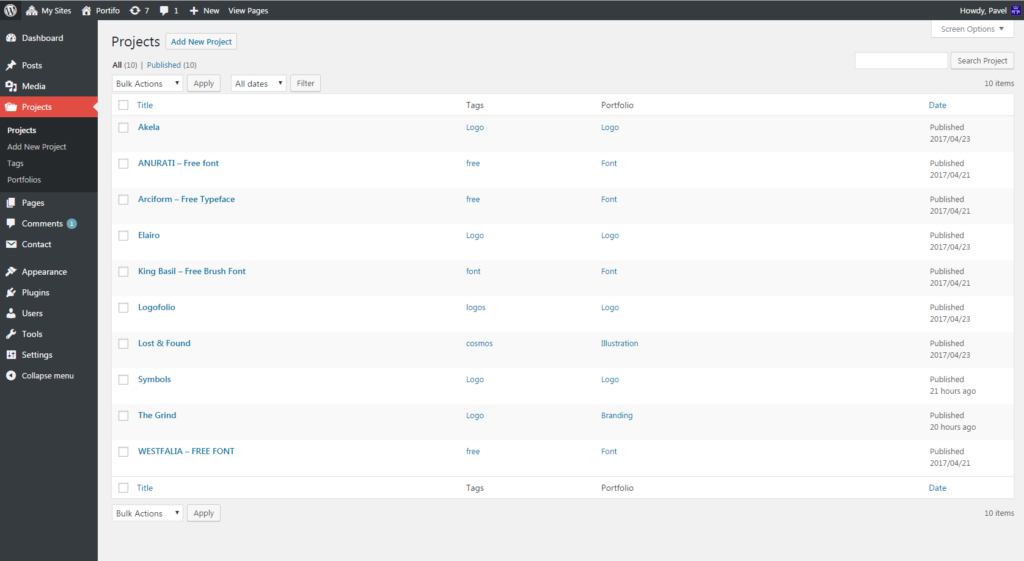
1. Create New Portfolio in WP Admin > Projects > Portfolios . Portfolio Title is also title of Filter on Portfolio Page.
2. Create New Project WP Admin > Projects > Add New Project.
3. Insert Feature Image to display Thumbnail on Portfolio Page.
4. Use Visual Editor to insert any Portfolio content.
Shortcodes
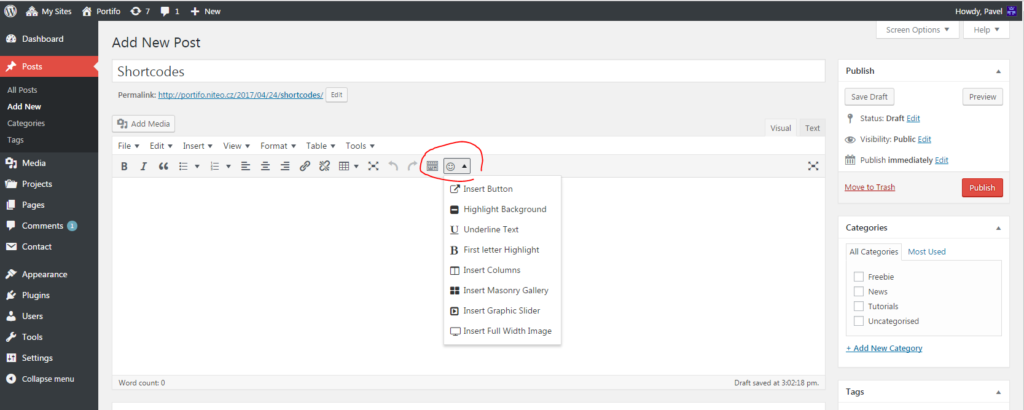
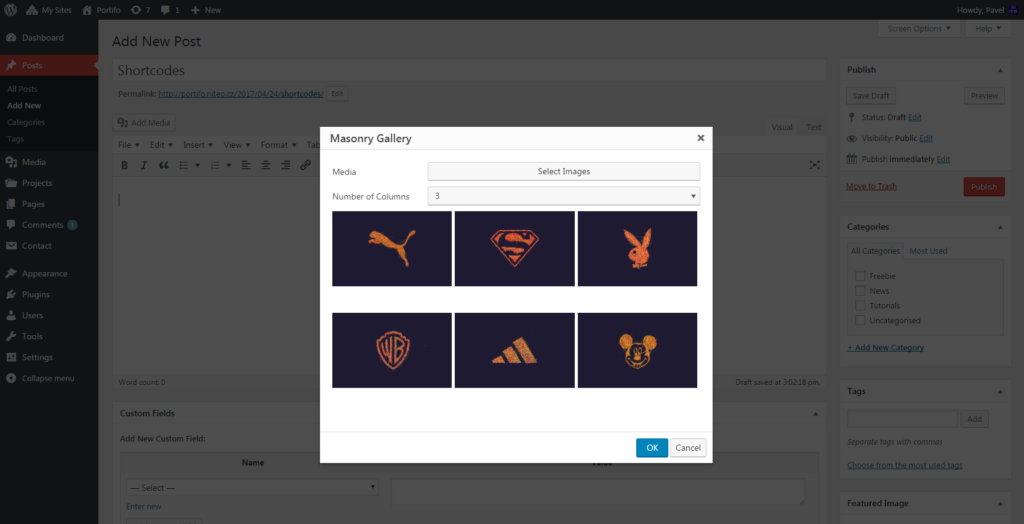
We prepared some very handy shortcodes for you which you can use to edit Posts, Projects or Pages. To access Shortcodes click on Smiley in your Visual Editor.
Google Analytics
1. To insert Code for Google Analytics we recommend install plugin Insert Headers and Footers and insert your custom GA code into Header. By this, you don`t loose any data when changing to different Theme.
Translation
1. Theme can be translated to any language. Translation file is in Theme/language folder, you can just simply edit the PO file. More info about translation is here.
That`s all. Thanks for looking, your Niteo.

